
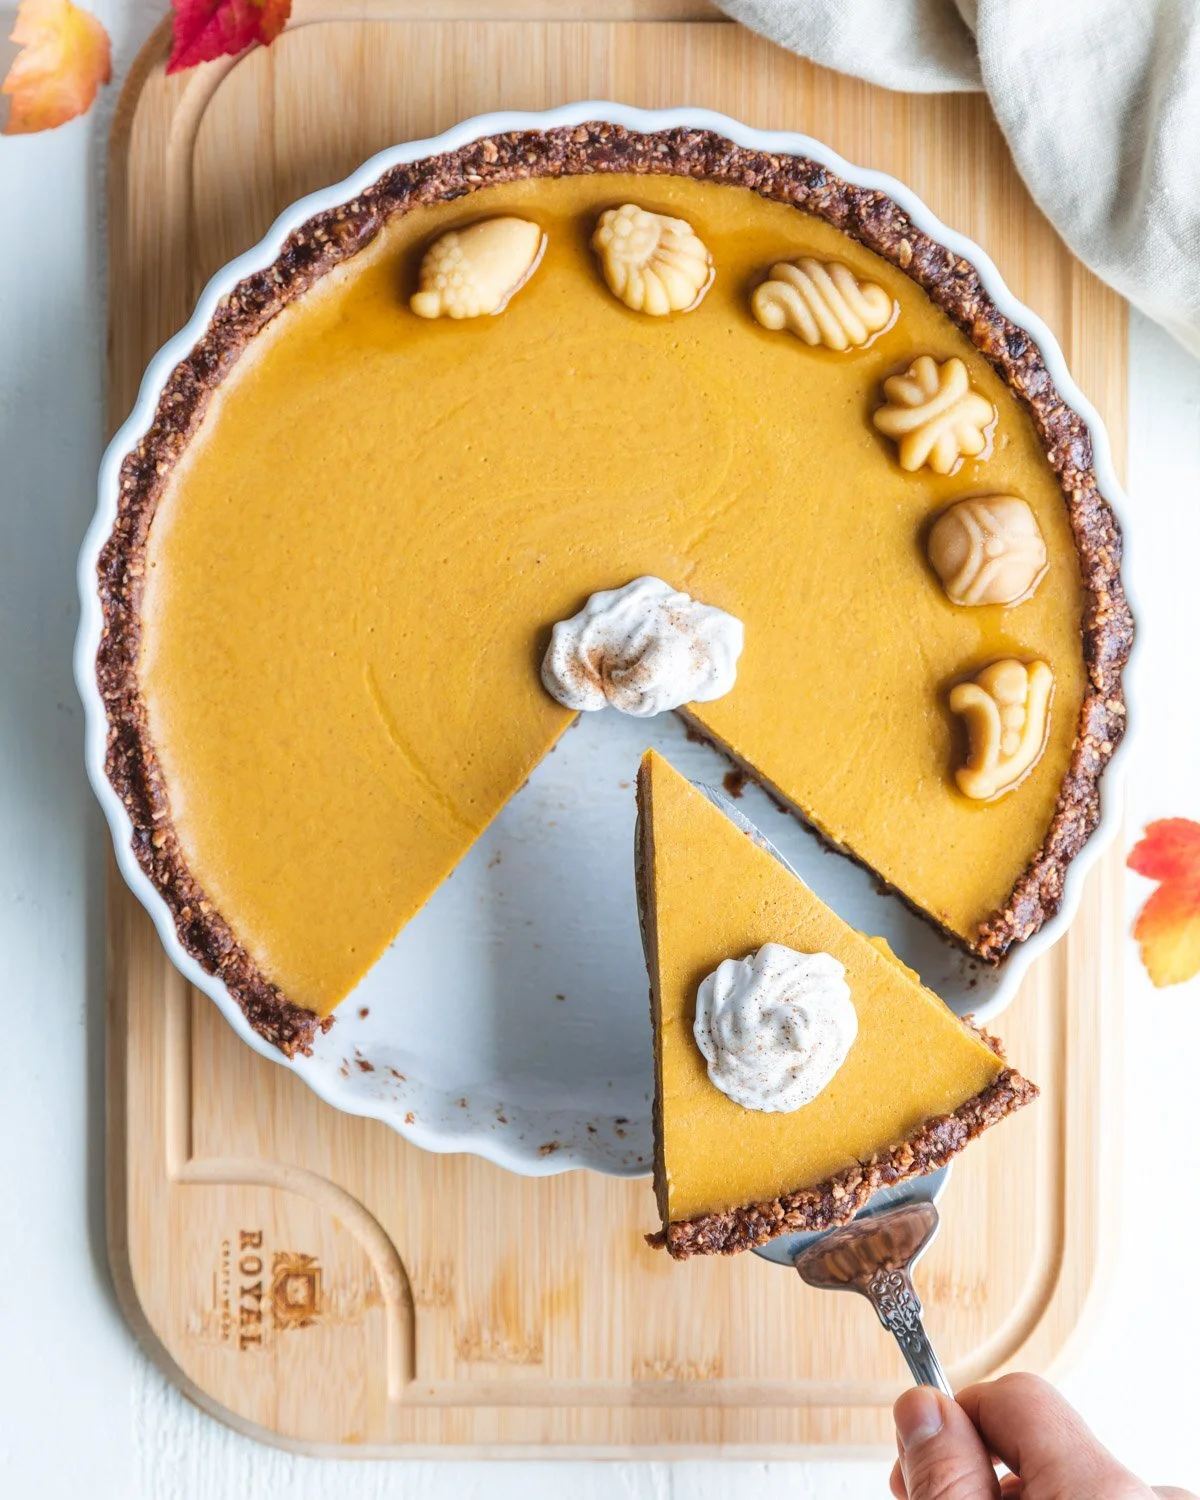
No Bake Vegan Pumpkin Pie with Gluten Free Crust
Save space in your oven this holiday season with a luxurious No-Bake Vegan Pumpkin Pie! It’s silky smooth from coconut cream and made with a gluten-free crust that tastes just like a cookie. This pie is SO tempting and delicious no one will guess that it’s vegan!

Every year my son would ask for a pumpkin pie on his birthday instead of a cake. This became such a tradition that I even mailed him a pie (that actually arrived in one piece!) to his college dorm. This first pumpkin pie of the season signaled the kickoff for fall baking, and I became pretty attached to my traditional Libby’s pumpkin pie recipe with eggs and dairy.
Well, after testing both baked and unbaked vegan pies, I’m ecstatic to share this No Bake Vegan Pumpkin Pie recipe with you! It’s rich and silky from coconut cream with just the right amount of sweetness, and all the spices you’ve come to love in a pumpkin pie. It even has a gluten-free crust with a touch of chocolate cause…pumpkin and chocolate are sooo good!

The secret ingredient for a flawless no-bake vegan pumpkin pie is…

Agar Powder:
What is it?
Agar is a naturally gelatinous powder derived from marine red algae. It works just like regular gelatin but is made from plants instead of boiled animal parts. It’s tasteless and dissolves quickly in liquid. It’s important to use agar power and not agar flakes in this recipe.
How much do I use?
A little goes a long way. For that classic baked pumpkin pie texture, you only need ½ teaspoon of agar powder to get the pie to set up and have that “just right” custard texture. I tested 2 teaspoons which made for an overly firm, almost chewy, pie. Then I tested 1 teaspoon which was still a little firm, and then, finally, ½ teaspoon which set up perfectly and had the best melt-in-your-mouth feel. On my first try I actually forgot to add the agar powder and ended up with a pumpkin smoothie (lol) instead of a pumpkin pie, so you definitely need the agar powder!
How long does it take to set?
If you transfer your pie straight to the fridge, it will take about an hour (or a little longer) to set up. But the hot filling can slosh onto the crust during the transfer, so I usually let mine sit on the counter to cool first and then transfer it to the fridge to finish setting up. I find this pie tastes more flavorful and creamier at room temperature.

Why this recipe works:
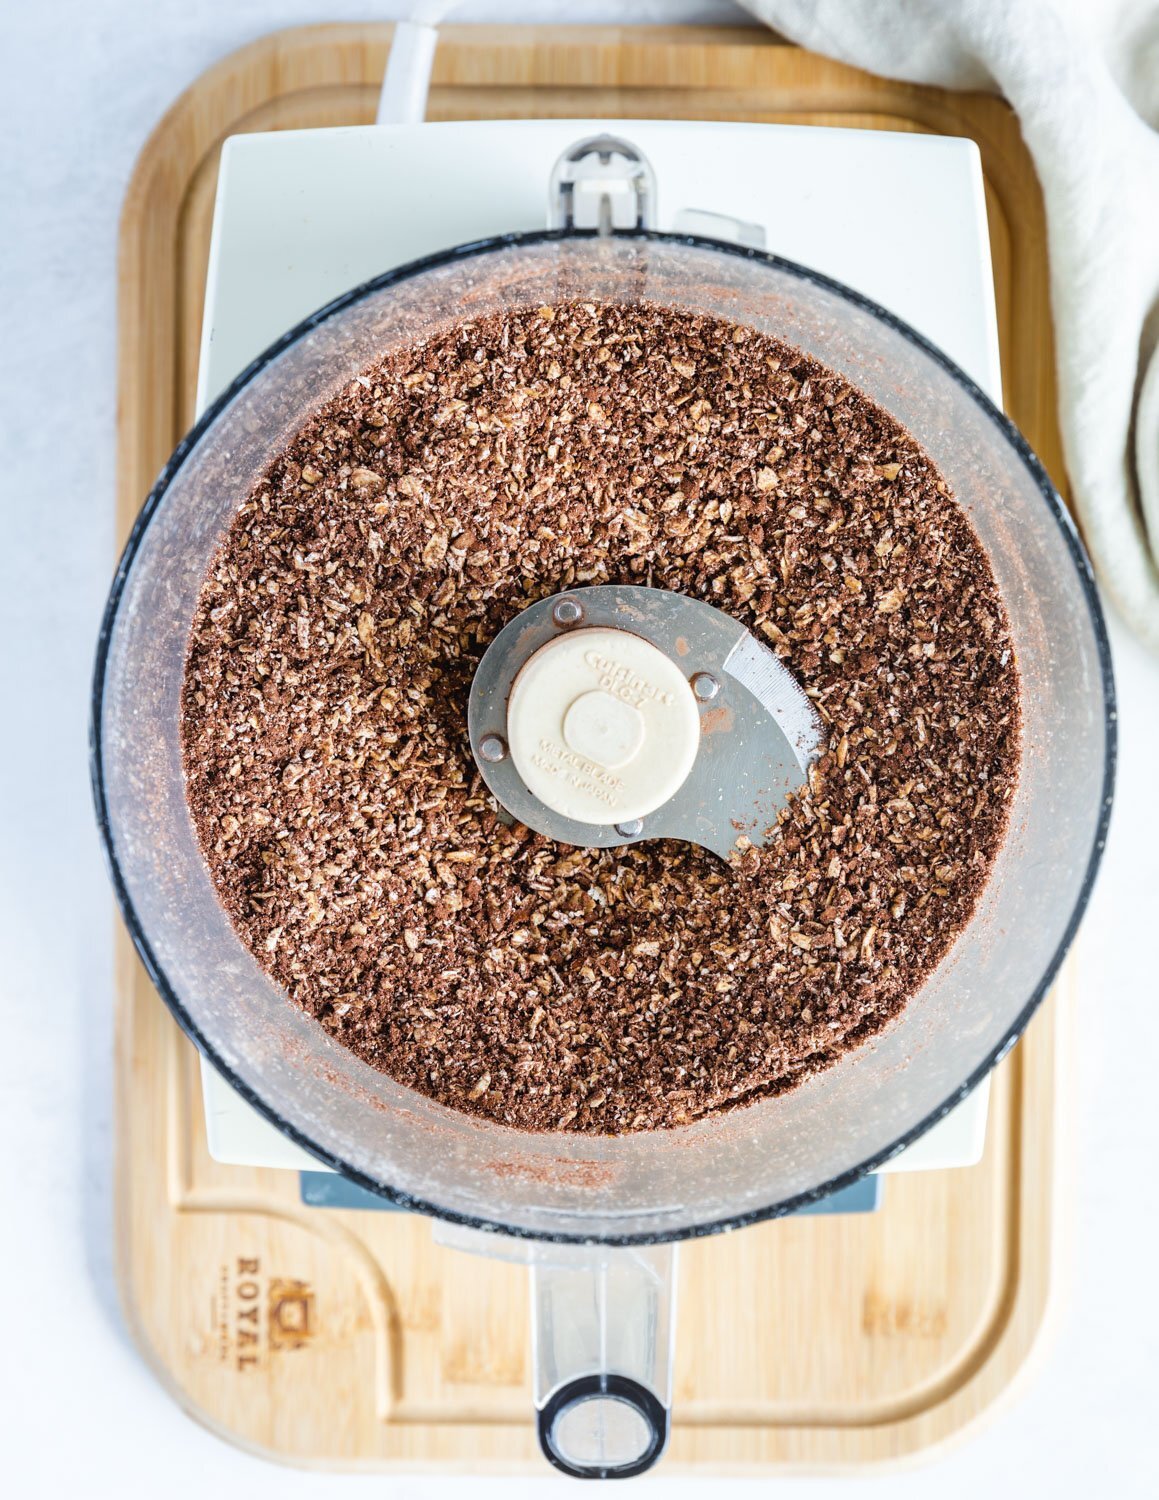
The crust is made in a food processor:
Nothing this delicious could be more trouble-free. Skip the rolling pin and worry about creating a perfectly flakey crust. Just toss your dry ingredients into a food processor (not a blender) and pulse until you have a coarse flour. Then add your wet ingredients and dates and process until it all sticks together. Pat into a tart/pie pan and you’re good to go!
Uses the whole can of pumpkin and coconut cream:
This recipe saves space and waste in the fridge, from partially used cans, by using the whole can of pumpkin puree and coconut cream. Scoop the cream needed for the crust out of the can first and then use the rest for the filling.
The filling is cooked on the stovetop:
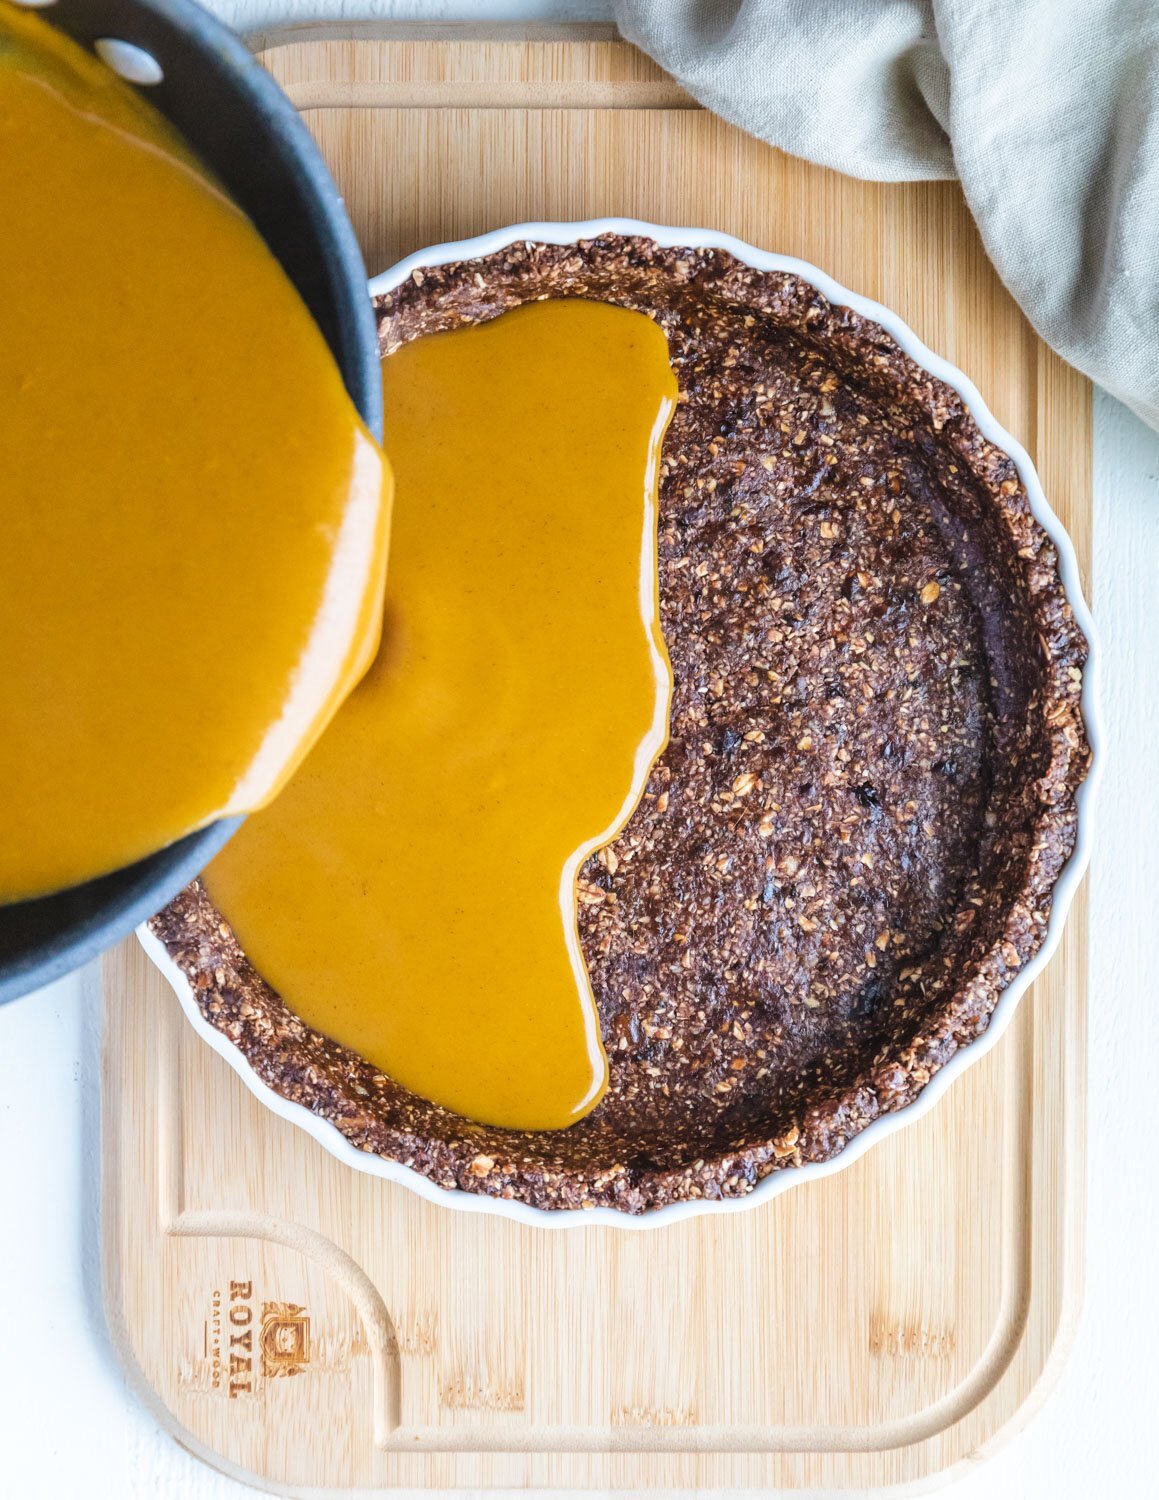
Heat the filling to just below boiling on the stovetop, to activate the agar powder, simmer for 2 minutes, stir in the vanilla, and pour into the crust. This simple pie sets up in the fridge, leaving your oven open for all your other holiday baking needs.
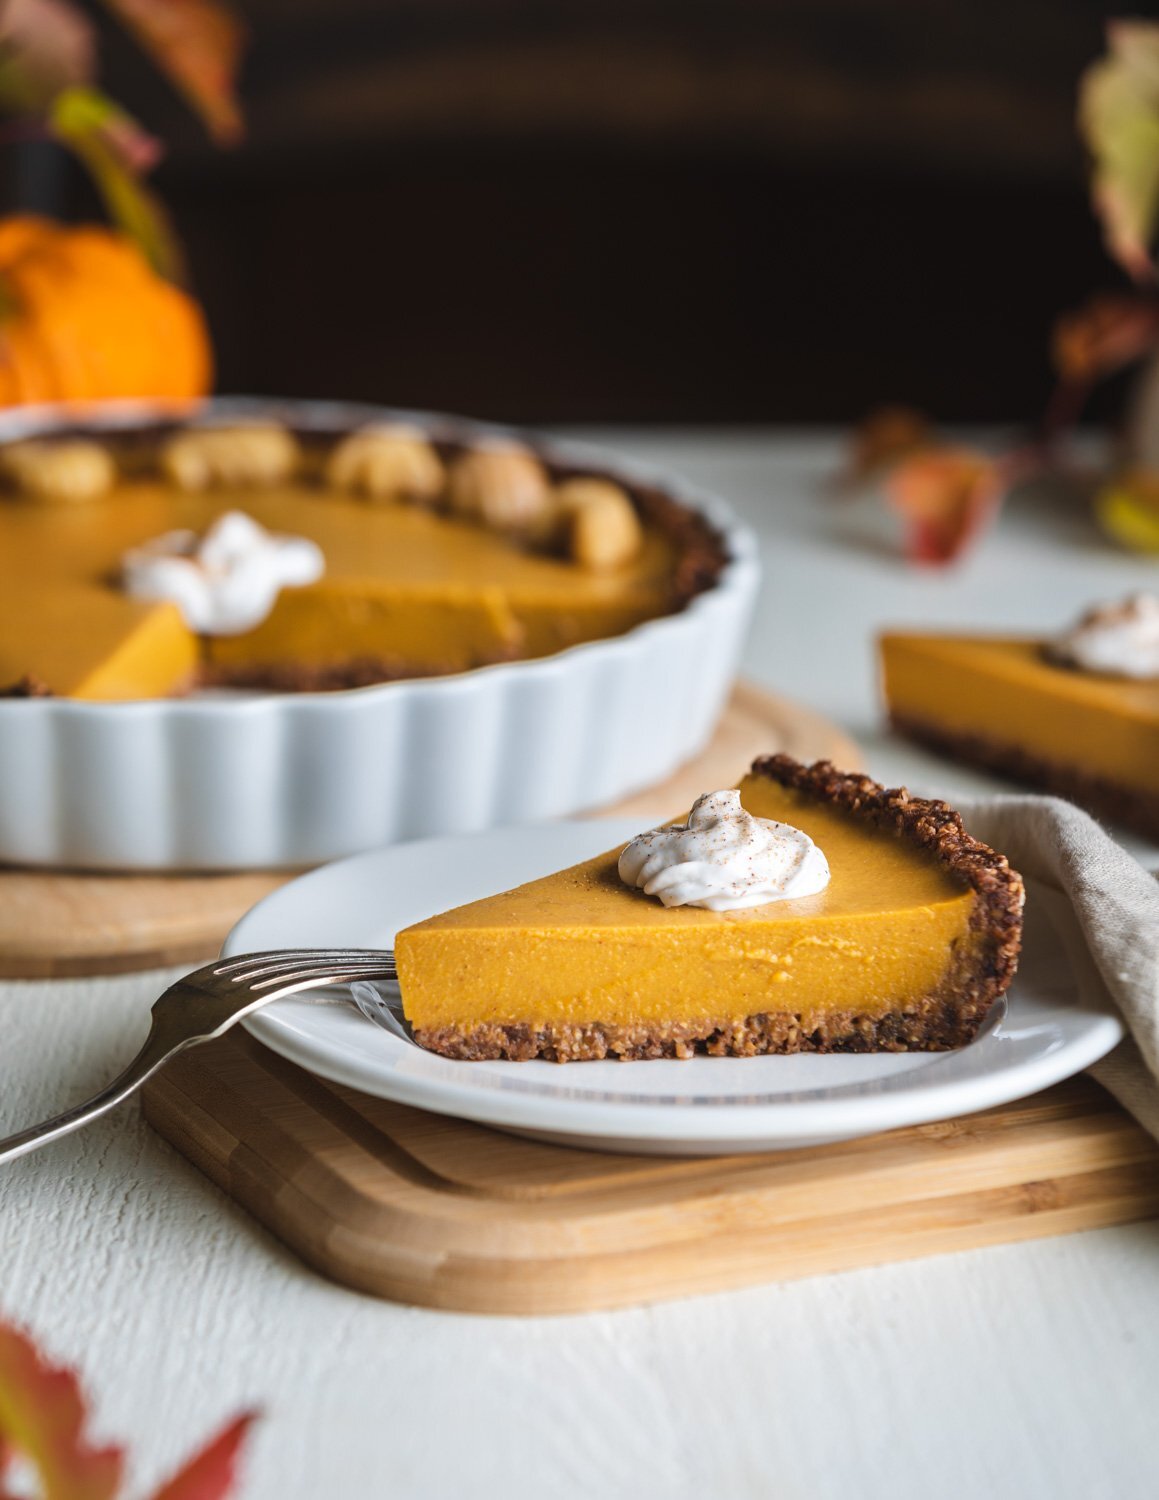
My son loves this pumpkin pie just as much as his old fav. It tastes decadent and luxurious but is so much simpler to make than a baked pie with a rolled crust and is healthier too! This pie will definitely be on our Thanksgiving table, and I hope you give it a try too!
Keep scrolling for step-by-step instructions with photos!

Ingredients for the gluten-free crust:

1½ cups (135 grams) of gluten-free rolled oats
½ cup (65 grams) of pecans
2 tablespoons of cocoa powder
¼ teaspoon of fine sea salt
2 tablespoons of coconut cream, melted and pourable (scoop out 2T from the can you are going to use for the filling) (see note on coconut cream)
2 tablespoons of maple syrup
1½ cups (220 grams) of medjool dates, pitted (about 12 large dates)
How to make the gluten-free crust:
Steps 1-2:
1. Line the bottom of a 9.5” x 1.5” tart pan or a 9.5” deep-dish pie pan with parchment paper. Do this by using the bottom of the pan as a template to draw and then cut a circle the same size as the pan. Lightly rub the sides with oil or line them with strips of parchment for a no-oil option.
2. Combine the rolled oats, pecans, cocoa powder, and salt in a food processor and pulse until coarsely ground.

Step 3:
3. Pour the melted coconut cream and maple syrup over the oat mixture and add in the dates. Process until the mixture begins to clump together and can form a ball when pressed between your fingers.


Steps 4-5:
4. Using your hands, spread the dough evenly over the bottom and sides of the tart/pie pan. Continue to press the dough until it is nice and smooth and evenly covers the pan.
5. Place in the freezer to set while you make the filling.
Recipe recycle! This is the same irresistible crust from my Dark Vegan Chocolate Tart. The hint of chocolate pairs so nicely with creamy pumpkin.
Ingredients for the no-bake vegan pumpkin pie filling:

1 (15 oz.) can (1½+ cups / 425 grams) of pumpkin puree (not pumpkin pie filling)
1 (13.66 fl. oz.) can (1½ cups / 403 ml.) of coconut cream (use the whole can minus the 2T used for the crust) (see note on coconut cream)
1/3 cup (2.7 oz.) of maple syrup
½ teaspoon of agar powder (not agar flakes)
1 teaspoon of cinnamon
½ teaspoon of ginger
¼ teaspoon of cloves
¼ teaspoon of fine sea salt
1 teaspoon of vanilla
How to make the no-bake vegan pumpkin pie filling:

Step 1:
1. In a 3-quart saucepan, with the heat off, whisk together the pumpkin puree, stirred coconut cream, maple syrup, agar powder, spices, and salt until completely smooth.

Step 2:
2. Turn the heat on to medium-high and gently stir with a soft spatula until the mixture reaches at least 185 F / 85 C. This can take around 10 minutes depending on your burner. You’ll know you’re at the right temperature when little bubbles barely begin to rise up from the bottom of the pan. The mixture will also look thinner and darker in color. Continue to simmer, while stirring, for 2 minutes more, turning the heat down to medium, if the filling starts to boil.
Step 3:
3. Remove from the heat and stir in the vanilla. Pour into prepared pie crust, smoothing out any bubbles that have formed on the surface. Carefully transfer to the fridge to set or let it sit on the counter to cool and then refrigerate. (This will take about an hour or more.)

Step 4:
4. Serve at room temperature with coconut whipped cream and a grating of fresh nutmeg!
Storage:
Store in the fridge, covered, for 5 days or in the freezer for a month.
Notes:
Coconut Cream: The easiest way to use coconut cream is to buy a can (13.66 oz. / 403 ml.) of coconut cream. This is thicker than canned coconut milk.
You can also 1½ cups coconut cream from 2 cans (13.5 oz. / 398 ml.) of full-fat coconut milk (the kind that comes in a can not a carton). To separate the cream from the liquid, put the cans in the fridge for 24 hours, to allow the cream to separate and become solid. Then scoop out the hard cream, saving the liquid for another use. Let the cream come to room temperature before blending it into the pie filling.

Other tempting holiday desserts to try!


No-Bake Vegan Pumpkin Pie with Gluten Free Crust
Ingredients
Instructions
- Line the bottom of a 9.5” x 1.5” tart pan or a 9.5” deep dish pie pan with parchment paper. Do this by using the bottom of the pan as a template to draw and then cut a circle the same size as the pan. Lightly rub the sides with oil or line them with strips of parchment for a no-oil option.
- Combine rolled oats, pecans, cocoa powder and salt in a food processor and pulse until coarsely ground.
- Pour the melted coconut cream and maple syrup over the oat mixture and add in the dates. Process until the mixture begins to clump together and can form a ball when pressed between your fingers.
- Using your hands, spread the dough evenly over the bottom and sides of the tart/pie pan. Continue to press the dough until it is nice and smooth and evenly covers the pan.
- Place in the freezer to set while you make the filling.
- In a 3-quart saucepan, with the heat off, whisk together the pumpkin puree, stirred coconut cream, maple syrup, agar powder, spices, and salt until completely smooth.
- Turn the heat on to medium-high and gently stir with a soft spatula until the mixture reaches at least 185 F / 85 C. This can take around 10 minutes depending on your burner. You’ll know you’re at the right temperature when little bubbles barely begin to rise up from the bottom of the pan. The mixture will also look thinner and darker in color. Continue to simmer, while stirring, for 2 minutes more, turning the heat down to medium, if the filling starts to boil.
- Remove from the heat and stir in the vanilla. Pour into prepared pie crust, smoothing out any bubbles that have formed on the surface. Carefully transfer to the fridge to set or let it sit on the counter to cool and then refrigerate. (This will take about an hour or more.)
- Serve at room temperature with coconut whipped cream and a grating of fresh nutmeg!
Notes
Storage:
Store in the fridge, covered, for 5 days or in the freezer for a month.
Coconut Cream: The easiest way to use coconut cream is to buy a can (13.66 oz. / 403 ml.) of coconut cream. This is thicker than canned coconut milk.
You can also 1½ cups coconut cream from 2 cans (13.5 oz. / 398 ml.) of full-fat coconut milk (the kind that comes in a can not a carton). To separate the cream from the liquid, put the cans in the fridge for 24 hours, to allow the cream to separate and become solid. Then scoop out the hard cream, saving the liquid for another use. Let the cream come to room temperature before blending it into the pie filling.
For step-by-step instructions, with photos, see blog post!
Nutrition Facts
Calories
542.25Fat (grams)
17.38Sat. Fat (grams)
11.42Carbs (grams)
97.84Fiber (grams)
7.14Net carbs
90.70Sugar (grams)
77.40Protein (grams)
5.04Sodium (milligrams)
163.71Cholesterol (grams)
0.00Nutritional information is provided as a courtesy and is an estimate only. This information comes from online calculators.


